


")
In the fast-paced world of digital content creation, delivering high-quality videos is paramount. Premiere Pro, the industry-leading video editing software by Adobe, is a versatile tool that empowers content creators to bring their vision to life.
However, the true potential of a video is unlocked when it’s ready for the world to see. This is where video export becomes crucial. Exporting a video from Premiere Pro is the final step that transforms raw footage and edits into a polished, shareable masterpiece.
Welcome to this comprehensive blog that aims to demystify the art of video export in Premiere Pro. Whether you’re a seasoned video editor or a budding creator, this guide will walk you through the process of exporting videos like a pro.
We will delve into the intricacies of export settings, discuss best practices, and provide valuable tips to optimize your video exports for various platforms.
Before embarking on your video export journey, understanding the various export settings is essential. Premiere Pro offers a multitude of options that can significantly impact the final video’s quality and compatibility with different devices and platforms.
From resolution and format to frame rate and codecs, we will explore each setting’s role and how it can elevate your video exports to new heights. So let’s dive into the world of Premiere Pro video export and unleash the true potential of your creations.
Getting Started: Exporting Your Video
Exporting a video from Premiere Pro is a straightforward process, but it’s crucial to understand the steps to achieve the desired output. To begin, ensure that your video project is fully edited and ready for export. Once you’re ready, follow these steps:
Step 1: Select the Sequence
In the Project panel, locate the sequence you want to export. Right-click on the sequence and choose “Export” from the dropdown menu.
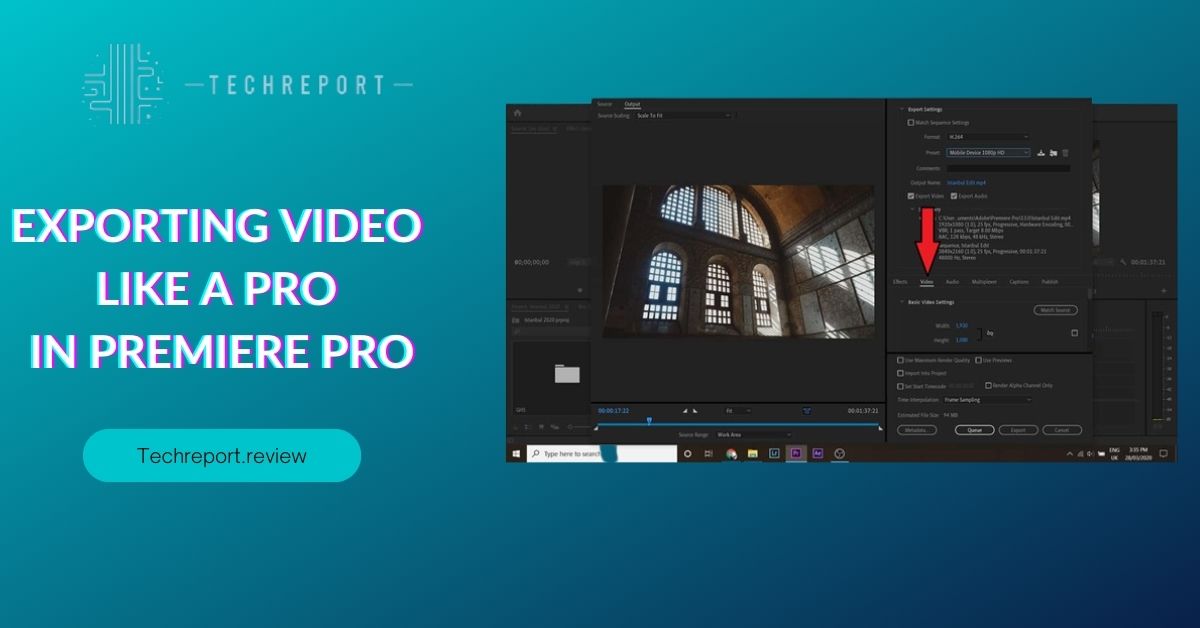
Step 2: Choose Export Settings
The Export Settings window will open, presenting a plethora of options to customize your video export. Here, you can set the format, resolution, frame rate, audio settings, and more.
Step 3: Select Format and Preset
Under the “Format” dropdown, choose the desired format for your video. Common options include H.264, QuickTime, ProRes, and more. Additionally, select a suitable preset that aligns with your intended use and platform, such as YouTube 1080p or Vimeo 4K.
Step 4: Adjust Video and Audio Settings
Depending on your requirements, modify video and audio settings. You can adjust the video codec, bitrate, frame size, and audio format to tailor the export to your needs.
Step 5: Output File Destination
Choose the destination folder where you want to save the exported video file. Ensure you select a location with enough storage space.
Step 6: Start Exporting
Double-check all your settings to avoid any errors. Once everything is set, click on the “Export” button, and Premiere Pro will begin rendering your video based on the specified settings.
Choosing the right export settings is crucial to strike a balance between video quality and file size. For most scenarios, the H.264 codec with a .mp4 container is a widely accepted choice. It offers excellent video quality while maintaining a manageable file size, making it ideal for online sharing and streaming.
For resolution, consider the platform where the video will be viewed. Common resolutions include 1080p (1920×1080) for YouTube and other online platforms, and 4K (3840×2160) for higher-end presentations or cinema-quality videos.
As for the frame rate, stick to the original frame rate of your footage, especially if you shot in a standard frame rate like 24fps, 30fps, or 60fps. Altering the frame rate can lead to quality loss or unnatural motion.
Premiere Pro allows users to export videos in a variety of formats, each tailored for specific platforms and purposes. For web-based sharing, the H.264 format with a .mp4 container is a popular choice due to its broad compatibility with online platforms like YouTube, Vimeo, and social media sites.
For more professional applications, consider formats like ProRes or DNxHD, which offer higher bitrates and superior quality suitable for post-production workflows. These formats are commonly used in video editing software and are perfect for preserving maximum quality during extensive editing processes.
For specialized needs, such as animation or video with transparency, consider formats like QuickTime with the Animation codec or the Apple ProRes 4444 codec. These formats support alpha channels and are ideal for retaining transparency in motion graphics and visual effects.
By choosing the right export format, resolution, and settings, you can ensure your videos look stunning and perform optimally across various platforms and devices. Mastering the art of video export in Premiere Pro will elevate your creations and captivate your audience.
High-Quality Video Export for YouTube
When exporting videos for YouTube, it’s essential to optimize your settings to ensure the best possible quality for online viewing. YouTube’s compression algorithms can affect video quality, so paying attention to the right export settings is crucial. Here are some recommended settings for exporting videos to YouTube:
- Format and Codec: Choose the H.264 codec with a .mp4 container. H.264 is a widely supported and efficient codec for online streaming, offering good quality and manageable file sizes.
- Resolution: For optimal results, use the resolution that matches your original footage. Common resolutions include 1080p (1920×1080) for HD content and 4K (3840×2160) for higher-resolution videos.
- Frame Rate: Stick to the original frame rate of your footage. If you shot your video at 24fps, 30fps, or 60fps, retain the same frame rate during export to avoid unnecessary conversions.
- Bitrate: YouTube recommends using a variable bitrate (VBR) with a target bitrate of 8 Mbps for 1080p videos and 16 Mbps for 4K videos. This ensures a balance between video quality and file size.
- Audio Settings: For audio, use AAC-LC format with a bitrate of 320 kbps for the best audio quality on YouTube.
While exporting videos for YouTube, it’s essential to preserve video quality and minimize compression artifacts. Compression is inevitable when uploading videos to online platforms, but you can take steps to mitigate its impact:
- Bitrate Control: Choose a higher bitrate for your export settings. A higher bitrate means more data is allocated to each frame, resulting in better quality. However, keep in mind that higher bitrates also lead to larger file sizes.
- Two-Pass Encoding: Enable two-pass encoding during export if your video editing software supports it. This method analyzes the video content twice, optimizing the compression process for better quality.
- Minimize Transcoding: Avoid transcoding your video multiple times, as each transcoding pass can introduce quality loss. Stick to the original footage’s resolution, frame rate, and codec as much as possible.
- Export in High Bit Depth: If your footage is in a higher bit depth (e.g., 10-bit), consider exporting in the same bit depth to maintain color accuracy and fidelity.
- Export in ProRes or DNxHD: If you have access to professional codecs like ProRes or DNxHD, exporting your video in these formats can help preserve the highest quality for post-production work.
By following these optimization techniques and choosing the right export settings, you can ensure that your videos look their best on YouTube. High-quality videos not only impress viewers but also contribute to a more engaging and successful YouTube channel.
Transparency Matters: Exporting Videos with Transparent Backgrounds
Exporting videos with transparent backgrounds, also known as alpha channels, is essential for creating content with overlay effects, animations, and seamless integration into other projects. To achieve this, follow these steps:
- Ensure Alpha Channel Support: Before starting the export process, make sure your video composition in Premiere Pro includes elements with transparency, such as graphics, titles, or animations. These elements will be exported with an alpha channel.
- Choose the Right Format: For exporting videos with alpha channels, select a format that supports transparency, such as QuickTime Animation or ProRes 4444. Both of these formats maintain high-quality video and include an alpha channel to preserve transparency.
- Enable Alpha Channel: In the export settings, verify that the “Alpha Channel” option is enabled. This tells Premiere Pro to include transparency information during the export process.
- Export Settings: Adjust other export settings, such as resolution, frame rate, and bitrate, based on your project’s requirements.
- Export the Video: Click on the “Export” button, and Premiere Pro will generate a video file with a transparent background.
With videos exported with an alpha channel, you can take advantage of overlay effects and creative possibilities in your video editing projects:
- Overlays and Lower Thirds: Use videos with transparent backgrounds to add overlays, lower thirds, or logos to your main video footage. This technique is commonly seen in news broadcasts and documentaries.
- Video Compositing: Combine videos with alpha channels to create complex compositing effects, such as placing a video within a video or adding visual effects that interact seamlessly with the background.
- Animated Text and Graphics: Exported videos with alpha channels allow you to animate text and graphics independently of the background, creating visually engaging and dynamic content.
- Custom Transitions: Design custom transitions with videos that have transparent backgrounds, giving your videos a professional and polished look.
- Visual Effects and Motion Graphics: Use videos with alpha channels to integrate visual effects and motion graphics seamlessly into your videos, enhancing the overall visual appeal.
By exporting videos with transparent backgrounds and harnessing the power of alpha channels, you unlock a world of creative possibilities. This technique enables you to elevate your video editing game, create eye-catching content, and deliver a professional touch to your projects.
Custom Frame Rates: Flexibility in Video Export
Premiere Pro offers the flexibility to customize frame rates during video export, which is beneficial for various scenarios. To export videos with non-standard frame rates, follow these steps:
- Project Settings: Before exporting, ensure that your Premiere Pro project is set to the desired custom frame rate. Go to “Sequence” in the menu bar, select “Sequence Settings,” and adjust the frame rate according to your project’s requirements.
- Export Settings: In the export window, navigate to the “Video” tab and locate the “Frame Rate” settings. By default, Premiere Pro matches the export frame rate to the sequence frame rate. However, you can choose to override this setting.
- Custom Frame Rate: Select the “Custom” option and enter your preferred frame rate. You can input any value that suits your project, whether it’s higher or lower than the original sequence frame rate.
- Maintaining Quality: Keep in mind that exporting videos with higher frame rates may increase the file size and require more processing power for playback. Conversely, exporting with lower frame rates may result in smoother playback but could reduce motion fluidity.
- Test Playback: Before finalizing the export, play back the video to ensure the custom frame rate delivers the desired results. Verify that there are no issues with playback speed or visual smoothness.
Maintaining a consistent frame rate is crucial for delivering a smooth and enjoyable viewing experience. When exporting videos, consider the following points to ensure frame rate adaptation:
- Consistent Frame Rate: To maintain smooth playback, keep the frame rate consistent throughout your entire video. Sudden changes in frame rates can lead to jarring viewing experiences and distract the audience.
- Match Project and Export Frame Rate: Whenever possible, ensure that the project frame rate matches the desired export frame rate. This minimizes the need for frame rate adaptation during export, preserving the original motion flow.
- Motion Blur: If you encounter frame rate discrepancies between your project and export settings, consider adding motion blur to minimize visual choppiness during fast-paced movements.
- Avoid Interpolation: Interpolating frame rates during export should be avoided, as it may introduce artificial frames and result in an unnatural appearance.
- Frame Rate for the Platform: Depending on the platform where your video will be published, consider the standard frame rates for that platform to ensure smooth playback across various devices.
By customizing frame rates during video export and maintaining frame rate consistency, you can ensure that your videos deliver a smooth and immersive viewing experience to your audience. Proper frame rate adaptation enhances the overall quality of your content and keeps viewers engaged with your creative projects.
Exporting Video with Audio Tracks
When exporting videos from Premiere Pro, it’s essential to ensure that the audio quality remains intact. To preserve high-quality audio during the export process, follow these steps:
- Audio Format: In the export settings, navigate to the “Audio” tab to adjust the audio format options. For optimal audio quality, it is recommended to export audio in a lossless format like WAV or AIFF. These formats retain the original audio data without compression, ensuring the best audio fidelity.
- Sample Rate and Bit Depth: Set the sample rate and bit depth for the audio export. Commonly used sample rates are 44.1 kHz and 48 kHz, while bit depths of 16-bit and 24-bit are standard choices. Higher bit depths provide better dynamic range and audio precision.
- Audio Channels: Ensure that the correct number of audio channels is selected. For stereo audio, choose “2 Channels (Stereo).” If your project has multi-channel audio, select the appropriate channel configuration.
- Audio Levels: Double-check that the audio levels are appropriately adjusted to avoid clipping or distortion. Premiere Pro’s audio meters can help you monitor and adjust the levels accordingly.
- Test Playback: Before finalizing the export, play back the exported video with audio to confirm that the audio quality is satisfactory and no issues are present.
Premiere Pro offers various audio export options to accommodate different platforms and devices. Consider the following aspects when managing audio channels and formats:
- Stereo vs. Surround Sound: If your project involves surround sound or multi-channel audio, ensure that the audio export settings match the project’s audio configuration. Exporting surround sound for platforms that do not support it might lead to compatibility issues.
- Mono Audio: For specific platforms or projects, exporting audio in mono format may be necessary. Mono audio is commonly used for podcasts, voice-overs, and certain types of content.
- AAC Audio Format: While lossless formats like WAV and AIFF offer the best audio quality, they can result in larger file sizes. For online platforms and streaming services, exporting audio in the Advanced Audio Codec (AAC) format with a high bitrate can strike a balance between audio quality and file size.
- Compatibility: Consider the platform or device where your video will be published. Different platforms have specific audio format requirements, so ensure your audio export aligns with their guidelines to avoid playback issues.
- Batch Export: If you have multiple videos with similar audio settings, use Premiere Pro’s batch export feature to streamline the process and maintain consistency across your content.
By following these guidelines for exporting video with audio tracks, you can ensure that the audio quality remains excellent and the exported videos deliver an engaging and immersive auditory experience to your audience. Proper audio management enhances the overall production value of your videos and contributes to a professional and polished end product.
In Crux
Congratulations! You have now mastered the art of video export in Adobe Premiere Pro. Understanding the intricacies of exporting videos is vital for content creators, as it significantly impacts the final quality and presentation of their work.
By following the step-by-step instructions and best practices provided in this guide, you can ensure that your exported videos are of top-notch quality and ready to impress your audience.
The knowledge gained from this guide empowers you to take your video editing skills to the next level. With a firm grasp of export settings, you can confidently tailor your videos for various platforms and purposes without compromising on quality.
Whether you’re sharing your content on social media, YouTube, or professional platforms, your exported videos will stand out with their visual appeal and high-fidelity audio.
One of the most exciting aspects of video export is that it allows you to bring your creative ideas to life. By customizing frame rates, creating transparent backgrounds, and optimizing for specific platforms, you have the tools to craft videos that match your artistic vision.
Premiere Pro’s flexibility and control over export settings put you in the driver’s seat, turning your imagination into reality on the screen.
Remember, video export is not just a technical process but an opportunity to elevate your storytelling. With each export, you have the chance to share your narrative with the world and connect with your audience on a deeper level.
As you continue to experiment and refine your video export techniques, your videos will continue to evolve and captivate viewers with their professional polish.
So go ahead and export your videos with confidence! Unleash your creativity, and let the world experience the magic of your storytelling. With Adobe Premiere Pro and the knowledge you’ve gained, the possibilities are limitless, and your journey to video excellence has just begun. Happy exporting!
How much did you like our detailed Exporting Video Like a Pro: Your Premiere Pro Guide. Please share these Blogs with your friends on social media.
Related Blogs
- Is iPhone 14 Worth the Hype
- iPhone 15 Pro
- Apple CarPlay
- Apple Watch
- iPhone 6 vs Nexus 6
- Apple Vision Pro
FAQs about Exporting Video
What are the recommended export settings in Premiere Pro?
The recommended export settings in Premiere Pro depend on your project's requirements and the intended platform. For high-quality YouTube videos, you can use the H.264 codec with a high bitrate and a resolution of 1080p or 4K. For professional work, consider using the ProRes or DNxHR codecs for maximum quality. Keep in mind that the export settings may vary based on your project's frame rate and aspect ratio.
Can I export a video in different formats from Premiere Pro?
Yes, Premiere Pro offers a wide range of export formats to cater to various needs. From standard video formats like MP4, MOV, and AVI to professional formats like ProRes and DNxHR, you can choose the format that best suits your requirements. Additionally, you can export audio-only files or image sequences for specialized projects.
How do I export a high-quality video for YouTube from Premiere Pro?
To export a high-quality video for YouTube from Premiere Pro, use the H.264 codec with a high bitrate and a resolution of 1080p or 4K. Choose the "YouTube 1080p Full HD" or "YouTube 2160p 4K" preset in the Export Settings window to ensure optimal quality. Keep in mind that YouTube's compression may affect the video's quality, so it's essential to start with the best possible export settings.
Is there a specific process for exporting videos with transparent backgrounds in Premiere Pro?
Yes, you can export videos with transparent backgrounds, also known as alpha channels, in Premiere Pro. To do this, ensure that your sequence has an alpha channel enabled for transparent elements. Then, choose a video format that supports alpha channels, like QuickTime with the Animation codec or PNG sequence. The transparent areas will be preserved when you export the video.
Can I export a video with custom frame rates in Premiere Pro?
Absolutely! Premiere Pro allows you to export videos with custom frame rates to suit your project's needs. In the Export Settings window, you can enter your desired frame rate under the "Frame Rate" option. Keep in mind that it's essential to choose a frame rate consistent with your sequence settings to avoid potential playback issues.
What are the best export settings for social media platforms like Instagram and Facebook?
Social media platforms like Instagram and Facebook have specific requirements for video uploads. For Instagram, use the H.264 codec with a resolution of 1080x1080 for square videos or 1080x1920 for vertical videos. For Facebook, H.264 with a resolution of 1080p is ideal. Additionally, consider using a high bitrate to maintain quality after compression.
How do I export a video in 4K resolution from Premiere Pro?
To export a video in 4K resolution from Premiere Pro, ensure that your sequence settings match the 4K resolution (3840x2160 or 4096x2160). Then, choose a video format like H.264 or ProRes with a resolution of 3840x2160 or 4096x2160 in the Export Settings window. Keep in mind that exporting in 4K may require more processing power and time.
Are there any specific export settings for videos with subtitles or closed captions?
Yes, when exporting videos with subtitles or closed captions in Premiere Pro, make sure your sequence includes the necessary caption tracks. Then, choose a video format that supports captions, like QuickTime with the CEA-608 or CEA-708 closed captioning options. This will ensure that your exported video includes the appropriate caption data.
Can I export multiple videos simultaneously in Premiere Pro?
Premiere Pro offers a batch export feature that allows you to export multiple videos simultaneously. To use this feature, create an export preset with your desired settings. Then, select the sequences you want to export and go to the "File" menu, choose "Export," and click on "Media." In the Export Settings window, select your custom preset, and Premiere Pro will export all the selected sequences at once.


