


")
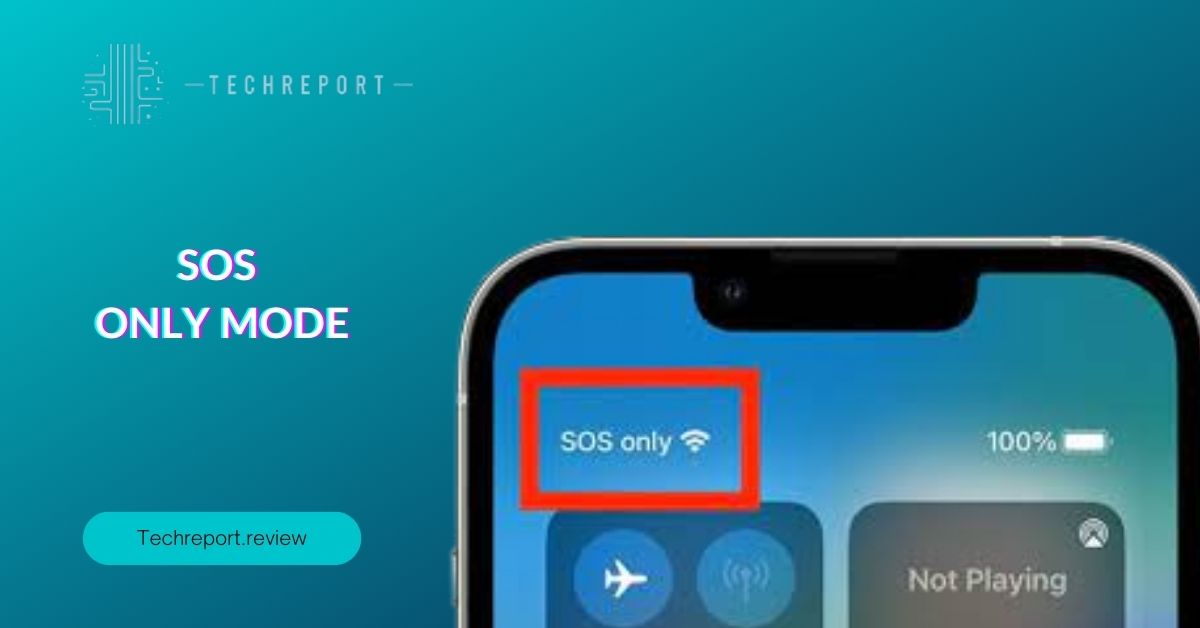
The SOS Only mode on an iPhone can be quite perplexing for users who expect a reliable network signal. Instead of the usual network bars, the screen displays “SOS Only,” indicating limited connectivity. This mode often arises when the iPhone fails to establish a connection with a cellular network. It can be frustrating and hinder communication, preventing users from making regular calls or accessing data services.
When an iPhone gets stuck in SOS Only mode, users may experience a range of emotions, including confusion, annoyance, and concern. The absence of a stable network signal can disrupt daily activities and leave users searching for answers. Understanding the cause of this issue and knowing how to resolve it becomes essential to restore seamless network connectivity.
The purpose of this blog is to provide a comprehensive guide on how to get rid of SOS Only on an iPhone. We will explore various methods, troubleshooting steps, and preventive measures to help users regain a reliable network signal. By following the instructions and tips provided, readers will be equipped to troubleshoot the SOS Only issue and enjoy uninterrupted network connectivity on their iPhones once again.
Understanding SOS Only on iPhone
There are various reasons why an iPhone might display SOS Only instead of a network signal. One possible cause is network coverage issues. If you are in an area with weak or no network coverage, your iPhone may not be able to establish a connection to a cellular network, resulting in the SOS Only mode. Additionally, problems with your SIM card, such as improper insertion, damage, or an expired SIM card, can also trigger the SOS Only display.
When your iPhone shows SOS Only, it indicates that your device is only able to make emergency calls. This mode restricts regular call functionality and prevents access to data services like messaging, internet browsing, and app usage. Essentially, your iPhone is limited to emergency communication capabilities, which can be a significant inconvenience when you need to stay connected for everyday tasks.
The SOS Only problem on an iPhone can occur due to several common reasons. Network-related issues, such as temporary outages or network congestion, can lead to a loss of network connectivity and trigger the SOS Only mode. Similarly, SIM card-related problems, including SIM card errors, expired or deactivated SIM cards, or incorrect SIM card insertion, can also result in the SOS Only display. Understanding these potential causes will help in troubleshooting and resolving the SOS Only problem effectively.
Troubleshooting Steps to Fix SOS Only on iPhone
If your iPhone is displaying SOS Only instead of a network signal, you can follow these step-by-step troubleshooting methods to resolve the issue:
- Check network coverage and signal strength: Ensure that you are in an area with proper network coverage. Sometimes, weak signal strength or network outages can cause the SOS Only mode. Try moving to a different location or check with others in the area to confirm if the issue is specific to your iPhone.
- Verify the SIM card is properly inserted and activated: Remove the SIM card from your iPhone and reinsert it carefully, ensuring it is properly seated in the SIM card tray. Additionally, ensure that your SIM card is active and not expired. Contact your network service provider if you are unsure about the status of your SIM card.
- Restart the iPhone and reset network settings: Restarting your iPhone can often resolve temporary software glitches. Press and hold the power button until the “slide to power off” slider appears, then slide to turn off your iPhone. Wait a few seconds, then press and hold the power button again until the Apple logo appears. Additionally, you can reset the network settings on your iPhone by going to Settings > General > Reset > Reset Network Settings. Note that this will remove your saved Wi-Fi passwords, so make sure to reconnect to Wi-Fi networks afterward.
- Update the iPhone’s software to the latest version: Keeping your iPhone’s software up to date is essential for optimal performance and bug fixes. Check for any available software updates by going to Settings > General > Software Update. If an update is available, follow the on-screen instructions to install it.
- Contact the network service provider for assistance: If the SOS Only problem persists after trying the above troubleshooting steps, it’s advisable to contact your network service provider. They can provide further guidance, check for any network issues specific to your account, or troubleshoot any SIM card-related problems.
By following these troubleshooting methods, you should be able to fix the SOS Only issue on your iPhone and regain normal network connectivity.
Disabling SOS Only Feature on iPhone
If you want to disable the SOS Only feature on your iPhone and restore regular network connectivity, you can follow these steps:
- Go to the iPhone Settings app: Locate the Settings app on your iPhone’s home screen and tap on it. The Settings app is represented by a gear icon.
- Navigate to the Emergency SOS settings: In the Settings menu, scroll down and look for the “Emergency SOS” option. Tap on it to access the Emergency SOS settings.
- Disable the “Call with Side Button” option: Within the Emergency SOS settings, you will see an option called “Call with Side Button.” By default, this option is enabled, allowing you to quickly initiate an emergency call by pressing the side button multiple times. To disable SOS Only mode, toggle off the “Call with Side Button” option. This will prevent your iPhone from automatically dialing emergency services when the side button is pressed repeatedly.
Once you have disabled the “Call with Side Button” option, your iPhone should no longer be stuck in SOS Only mode. You should now be able to access regular network connectivity and use your iPhone for making calls, sending messages, and accessing data services as usual.
It’s important to note that disabling the SOS Only feature does not disable the emergency calling functionality of your iPhone. In case of a genuine emergency, you can still make emergency calls by pressing the side button and the volume up button simultaneously or by using other emergency calling methods available on your iPhone.
By following these simple steps, you can easily disable the SOS Only feature on your iPhone and regain normal network functionality.
In Crux
In conclusion, resolving the SOS Only problem on your iPhone is crucial to ensure a seamless network experience. Being stuck in SOS Only mode can be frustrating, as it limits your ability to make regular calls and access data services. However, by following the steps outlined in this guide, you can successfully address the issue and regain normal network connectivity on your iPhone.
First and foremost, it’s important to understand the reasons behind the SOS Only problem, such as network coverage issues or SIM card problems. Troubleshooting these potential causes, including checking network coverage, verifying the SIM card’s proper insertion and activation, restarting the iPhone, resetting network settings, and updating the iPhone’s software, can often resolve the issue.
If the SOS Only problem persists despite these troubleshooting steps, it’s recommended to reach out to your network service provider for assistance. They can provide further guidance specific to your network and help troubleshoot the issue from their end.
Additionally, it’s worth exploring alternative methods to regain regular network connectivity on your iPhone. This could include using Wi-Fi calling, switching to a different network provider, or using a different SIM card if applicable.
By following the provided steps, seeking assistance when necessary, and exploring alternative solutions, you can overcome the SOS Only problem and enjoy uninterrupted network connectivity on your iPhone.
Remember, if you encounter any difficulties or are unsure about any steps, it’s always best to consult with your network service provider or seek professional assistance to ensure a smooth resolution.
We hope this guide has been helpful in addressing the SOS Only problem on your iPhone and enabling you to enjoy your iPhone’s full network capabilities once again. Stay connected and enjoy the seamless network experience on your iPhone!
How much did you like our detailed Lost in SOS Only Mode? Here’s How to Regain Network Connectivity on Your iPhone. Please share these Blogs with your friends on social media.
Related Blogs
- Is iPhone 14 Worth the Hype
- iPhone 15 Pro
- Apple CarPlay
- Apple Watch
- iPhone 6 vs Nexus 6
- Apple Vision Pro
Regain Network Connectivity on Your iPhone FAQ
Is it possible to remove the SOS Only mode on an iPhone?
Yes, it is possible to remove the SOS Only mode on your iPhone and restore regular network connectivity. By following the troubleshooting steps mentioned in this guide, you can address the underlying issues causing the SOS Only problem and regain full network access on your iPhone.
What are the steps to disable the SOS Only feature on iPhone?
To disable the SOS Only feature on your iPhone, you can adjust certain settings related to Emergency SOS. Open the Settings app on your iPhone, navigate to the Emergency SOS settings, and disable the "Call with Side Button" option. This will prevent your iPhone from entering SOS Only mode when the side button is pressed multiple times.
Why does my iPhone show SOS Only instead of a network signal?
There are several reasons why your iPhone might display SOS Only instead of a regular network signal. It could be due to poor network coverage in your area, issues with your SIM card, or even software-related problems. By troubleshooting the possible causes, you can identify and resolve the issue to restore regular network connectivity.
How do I switch from SOS Only to regular network connectivity on my iPhone?
To switch from SOS Only mode to regular network connectivity on your iPhone, you need to address the underlying issues causing the problem. Start by checking your network coverage and signal strength. Ensure that your SIM card is properly inserted and activated. If the issue persists, try restarting your iPhone and resetting the network settings. Updating your iPhone's software to the latest version can also help resolve software-related issues.
Are there any restrictions or limitations when trying to get rid of SOS Only on iPhones?
While troubleshooting and resolving the SOS Only problem on your iPhone, it's important to note that certain factors, such as network coverage, SIM card compatibility, or software issues, may limit your ability to completely eliminate the SOS Only mode. However, by following the provided steps and seeking assistance from your network service provider if needed, you can minimize the impact of these limitations and improve your network connectivity.
Can I fix the SOS Only issue on my iPhone without contacting my service provider?
In many cases, you can resolve the SOS Only issue on your iPhone without contacting your service provider. By following the troubleshooting steps outlined in this guide, you can address common network-related issues and restore regular network connectivity. However, if the issue persists or if it is related to network coverage or SIM card compatibility, it may be necessary to contact your service provider for further assistance.
What should I do if my iPhone is stuck in SOS Only mode?
If your iPhone is stuck in SOS Only mode despite attempting the troubleshooting steps, it's recommended to contact your network service provider for assistance. They can help troubleshoot the issue from their end and provide specific guidance based on your network and device configuration.
Is there a specific setting or toggle to turn off SOS Only on iPhone?
Yes, there is a specific setting you can adjust to turn off the SOS Only mode on your iPhone. By disabling the "Call with Side Button" option in the Emergency SOS settings, you can prevent your iPhone from entering SOS Only mode when the side button is pressed multiple times.
Are there any alternative methods to resolve the SOS Only problem on iPhone?
In addition to the troubleshooting steps mentioned earlier, there are alternative methods you can explore to resolve the SOS Only problem on your iPhone. These may include using Wi-Fi calling if available, switching to a different network provider, or using a different SIM card if applicable. These alternatives can provide temporary solutions or workarounds to ensure you have network connectivity on your iPhone.


