


In the digital age, our Macs have become the hub for storing a plethora of files and downloads. From documents to media, our computers are constantly accumulating data. However, the influx of downloads can quickly clutter up our storage and impact system performance. Embracing a clean and organized Mac experience is crucial to ensure smooth and efficient operation.
Welcome to this comprehensive guide on managing downloads and keeping your Mac clutter-free. The purpose of this blog is to empower you with the knowledge and tools to efficiently delete unnecessary downloads from your Mac, allowing you to make the most of your storage space and enhance your overall computing experience. Whether you’re a tech-savvy user or a beginner, we’ll walk you through the step-by-step process of clearing downloads, giving you the confidence to keep your Mac neat and organized.
Downloads play a significant role in consuming valuable disk space on your Mac. As you download files from the internet, they accumulate in various folders, including the Downloads folder, taking up storage. Over time, this can lead to reduced available disk space, which may slow down your Mac and affect its performance. By managing and deleting unnecessary downloads, you can regain valuable disk space and ensure your Mac runs smoothly and efficiently. Let’s dive into the world of download management and reclaim control over your Mac’s storage space.
Locating and Deleting Downloads
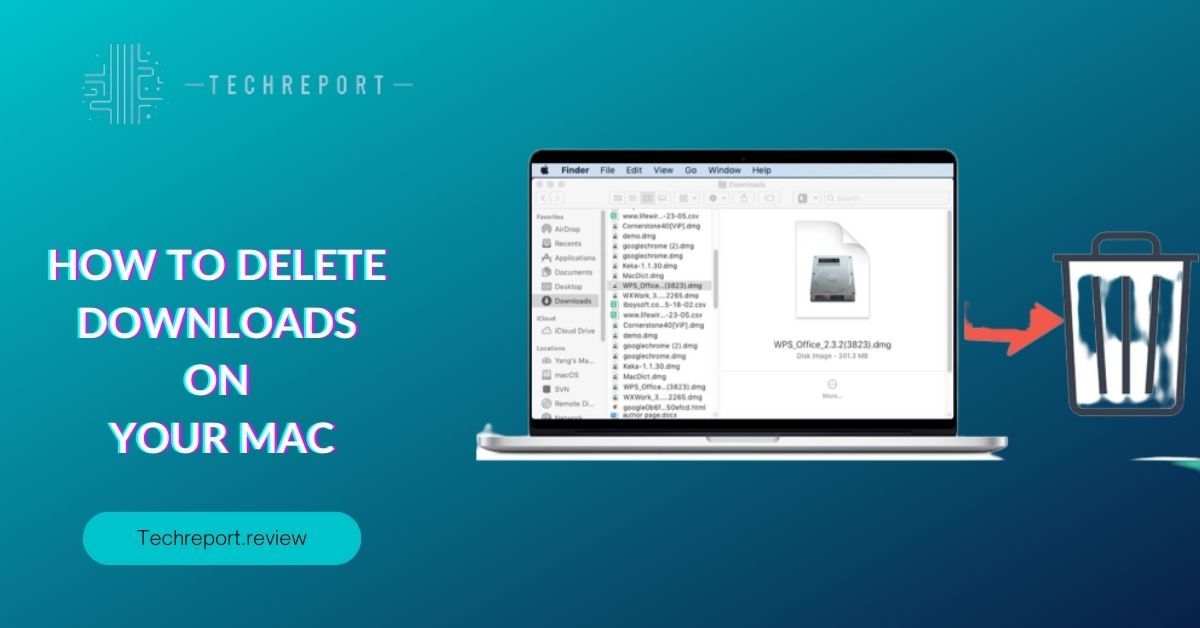
The Downloads folder is the default location where all downloaded files from the internet are stored on your Mac. To locate this folder, follow these simple steps:
- Click on the “Finder” icon in the Dock. This will open a new Finder window.
- Look for “Downloads” in the left sidebar under “Favorites.” Click on it to access the Downloads folder.
Alternatively, you can access the Downloads folder from the “Go” menu at the top of the screen. Click on “Go” and then select “Downloads” from the drop-down menu.
Once you’ve found the Downloads folder, it’s time to clear out the unnecessary files to free up disk space. Here’s a step-by-step process to manually delete downloads:
- Open the Downloads folder by following the steps mentioned earlier.
- Review the files in the folder and identify the ones you no longer need. These might include installation files, media files, or documents that you have already used.
- Select the file you want to delete by clicking on it once.
- Press the “Delete” key on your keyboard or right-click on the selected file and choose “Move to Trash” from the context menu.
- To confirm the deletion, click on “Move to Trash” in the pop-up dialog box.
- Repeat these steps for all the files you wish to remove from the Downloads folder.
If you have a large number of files in your Downloads folder, deleting them one by one can be time-consuming. Thankfully, there’s a way to delete multiple files at once, saving you valuable time. Here’s how:
- Open the Downloads folder, as described earlier.
- Click and hold the “Command” (⌘) key on your keyboard.
- While holding the Command key, click on the files you want to delete. Each file you click on will be selected.
- Once you have selected all the files you want to delete, press the “Delete” key on your keyboard or right-click on any of the selected files and choose “Move to Trash.”
- Confirm the deletion by clicking on “Move to Trash” in the pop-up dialog box.
By using the batch deletion method, you can efficiently remove multiple files from your Downloads folder with just a few clicks, allowing you to quickly reclaim storage space on your Mac.
Managing Downloads with Ease
Regularly clearing out your Downloads folder offers several significant benefits for your Mac’s overall performance and storage management. Here are some key advantages of deleting downloads:
- Increased Disk Space: Over time, the Downloads folder can accumulate a large number of files, taking up valuable disk space. By removing unnecessary downloads, you create more room for new files and applications, preventing your Mac from running out of storage.
- Improved System Performance: When your Mac’s storage space is limited, it can lead to slower performance and sluggishness. By freeing up space through deleting downloads, you allow your system to operate more efficiently, resulting in faster boot times and better overall performance.
- Enhanced Organization: An organized Downloads folder helps you find important files quickly and easily. By removing clutter, you can keep your Downloads folder tidy and make it easier to locate essential documents, media files, and installation packages.
Before deleting files from your Downloads folder, you might wonder if it’s safe to remove them. Here are some safety measures to consider:
- Review File Content: Before deleting any file, take a moment to review its content. Ensure you no longer need the file or have a backup copy elsewhere. Double-check that you won’t require the file in the future, especially for any critical documents or irreplaceable media.
- Avoid System Files: While it’s generally safe to delete files from your Downloads folder, exercise caution when dealing with system-related files or software installations. Deleting essential system files can cause issues with your Mac’s operation, so stick to removing files you are confident are safe to delete.
- Backup Important Data: If you have any doubts about deleting certain downloads, consider creating a backup of your Downloads folder on an external drive or cloud storage. This way, you can restore files if needed.
Accidentally deleting a crucial file can be distressing, but there are ways to recover deleted downloads on your Mac. Here are some methods to help you restore accidentally removed files:
- Check the Trash: When you delete files, they are moved to the Trash folder. To recover a deleted download, open the Trash, locate the file, right-click on it, and select “Put Back” to return it to its original location in the Downloads folder.
- Time Machine Backup: If you use Time Machine to back up your Mac, you can restore deleted downloads from a previous backup. Open Time Machine, navigate to the Downloads folder and select the file you wish to recover. Click on “Restore” to retrieve the file.
- Third-Party Data Recovery Software: In cases where the files are no longer in the Trash, third-party data recovery software can be helpful. These tools can scan your Mac for deleted files and attempt to recover them.
Always act quickly if you accidentally delete a file you need, as the longer you wait, the higher the chances of the file being overwritten on your hard drive. With the right precautions and recovery methods, you can confidently manage your Downloads folder and ensure that your important files are safe and easily accessible.
The Ins and Outs of Incomplete Downloads
In some cases, downloads may not complete successfully, leaving behind partially downloaded files in your Downloads folder. These incomplete downloads not only occupy space but can also cause confusion and clutter. Here’s how you can delete incomplete or failed downloads:
- Identify Incomplete Downloads: Start by locating the partially downloaded files in your Downloads folder. These files often have names indicating that the download was interrupted, such as “Download-Incomplete” or “Download-Failed.”
- Manual Deletion: To remove incomplete downloads manually, simply select the files you want to delete and move them to the Trash. To select multiple files at once, hold down the Command key while clicking on each file. Once the files are in the Trash, right-click on the Trash icon in your Dock and choose “Empty Trash” to permanently delete the files.
In some instances, you may encounter issues when attempting to delete incomplete downloads. Here are some troubleshooting tips to help you successfully remove these files:
- Restart Your Mac: If you experience any issues deleting incomplete downloads, try restarting your Mac. Restarting can resolve temporary glitches and may allow you to delete the files normally afterward.
- Force Quit Unresponsive Applications: Sometimes, an application that initiated the download may become unresponsive or hold onto incomplete download files. Use the Force Quit function (Option + Command + Esc) to close any unresponsive applications. Afterward, try deleting the incomplete downloads again.
- Check File Permissions: Ensure that you have the necessary permissions to delete the files. If you encounter a “Permission Denied” error, right-click on the file, select “Get Info,” and adjust the permissions in the “Sharing & Permissions” section.
- Use Terminal: As a last resort, you can use Terminal commands to force the deletion of stubborn incomplete downloads. Launch Terminal (Applications > Utilities > Terminal) and use the “rm” command followed by the file path to remove the file. Be cautious when using Terminal, as incorrect commands can lead to data loss.
By following these steps and troubleshooting tips, you can efficiently manage incomplete downloads and keep your Downloads folder clean and organized. Removing incomplete downloads not only frees up valuable disk space but also ensures a smoother experience when downloading files in the future.
Streamlining Deletion: Keyboard Shortcuts for Efficiency
When it comes to managing downloads on your Mac, keyboard shortcuts can be a game-changer. These nifty combinations of keys can save you time and effort, making the deletion process a breeze. Here are some essential keyboard shortcuts for deleting downloads:
- Command + Delete: Use this shortcut to move selected files to the Trash. Simply select the files you want to delete and press Command + Delete to send them straight to the Trash. Once you’re done selecting files, press Command + Delete again to confirm the deletion.
- Command + Shift + Delete: This powerful shortcut allows you to skip the Trash and delete files permanently. When you have files selected, press Command + Shift + Delete, and a confirmation dialog will appear. Be cautious when using this shortcut, as files deleted this way cannot be recovered.
Keyboard shortcuts are an essential aspect of macOS that can significantly enhance your workflow. By mastering these shortcuts, you’ll find yourself navigating deletion tasks with ease and efficiency. Here’s how keyboard shortcuts simplify the deletion process:
- Speed and Convenience: Using keyboard shortcuts eliminates the need to navigate through multiple menus and options. With a simple combination of keys, you can instantly move files to the Trash or delete them permanently, saving valuable time.
- Reducing Mouse Dependence: Relying less on the mouse and more on keyboard shortcuts can reduce strain on your wrist and fingers, promoting a more comfortable computing experience.
- Seamless Navigation: Keyboard shortcuts enable a smooth and uninterrupted workflow. Whether you’re organizing your Downloads folder or deleting files from other directories, these shortcuts provide seamless navigation.
- Consistency Across Applications: The same keyboard shortcuts often work across various applications, providing a consistent experience. Once you familiarize yourself with these shortcuts, you can apply them to file management tasks beyond just deleting downloads.
Remember that keyboard shortcuts may take some practice to get used to, but the time and effort invested in learning them will pay off in the long run. They’re an essential skill for any Mac user, helping you efficiently manage your files and maintain a clutter-free system. Whether you’re a casual user or a power user, incorporating keyboard shortcuts into your workflow will undoubtedly boost your productivity.
Tailoring Deletion: Deleting Specific Types of Download
As you manage your downloads on Mac, you may find yourself needing to delete specific types of files to keep your system organized and clutter-free. Fortunately, macOS provides a straightforward way to customize your deletion process and target specific file types. Here’s how you can do it:
- Open the Downloads Folder: First, navigate to your Downloads folder by clicking on the Finder icon in the Dock and selecting “Downloads” from the sidebar.
- Sort Files by Type: In the Downloads folder, click on the “View” menu at the top of the screen. From the drop-down menu, choose “Arrange By” and then select “Kind.” This action will group your downloaded files based on their file types, making it easier to identify and manage specific file categories.
- Select the Files to Delete: Now that your files are sorted by type, browse through the different categories to identify the specific file types you want to delete. For example, you might want to delete all PDFs, images, or installers that you no longer need.
- Delete the Selected Files: Once you’ve selected the files you want to delete, use the keyboard shortcut Command + Delete or right-click on the selected files and choose “Move to Trash.” This action will move the selected files to the Trash, where you can review and permanently delete them later if desired.
Organizing your downloads into categories can be a helpful way to keep your Downloads folder well-structured and easy to navigate. Instead of having all your downloaded files in a single cluttered space, you can create subfolders based on different file types or projects. Here’s how to do it:
- Create Subfolders: In your Downloads folder, right-click and select “New Folder.” Give the folder a descriptive name that represents the category or project it will contain. For example, you can create subfolders for “Images,” “Documents,” “Installers,” or any other relevant category.
- Organize Files into Subfolders: Drag and drop the downloaded files into their respective subfolders. You can also use the “Move to” option from the right-click menu to move files into the appropriate subfolder.
- Delete by Categories: If you decide to delete files by categories, simply open the subfolder containing the files you want to delete, select the files, and use the same deletion methods mentioned earlier (Command + Delete or right-click and choose “Move to Trash”).
By customizing your deletion process and managing your downloads by categories, you can keep your Downloads folder neat and tidy, making it easier to find specific files and freeing up valuable disk space on your Mac. With these simple yet effective techniques, you’ll be able to maintain a well-organized and clutter-free file system effortlessly.
The Difference Between Moving and Deleting Downloads
As you manage your downloads on your Mac, it’s essential to understand the distinction between moving and deleting files to maintain a well-organized file system. Both actions serve different purposes and can significantly impact your file management. Let’s explore the difference between moving and deleting downloads:
Moving Downloads:
Moving a file involves transferring it from one location to another within your Mac’s storage. When you move a download, you are relocating the file to a different folder or directory, which can be beneficial for better organization and easy access.
For example, let’s say you have downloaded a PDF file and it’s currently in your Downloads folder. If you want to organize it with other documents related to a project, you can create a new folder named “Project A” and move the PDF file into that folder. By doing so, you’re essentially reorganizing the file without deleting it from your Mac. This way, you can easily find all the documents related to “Project A” in one place.
To move a download:
- Select the file you want to move.
- Use the drag-and-drop method to move the file to the desired location.
- Alternatively, use the “Cut” (Command + X) and “Paste” (Command + V) commands to move the file to a different folder.
Deleting Downloads:
On the other hand, deleting a download involves permanently removing the file from your Mac’s storage. When you delete a file, it will be sent to the Trash, and you have the option to either restore it before emptying the Trash or permanently delete it from your system.
Deleting downloads can be useful for freeing up disk space and getting rid of files you no longer need. However, it’s essential to be cautious when deleting files, as once you empty the Trash, the files will be permanently removed from your Mac.
To delete a download:
- Select the file you want to delete.
- Use the “Move to Trash” option from the right-click menu or press Command + Delete.
- To permanently delete files, empty the Trash by right-clicking on the Trash icon in the Dock and selecting “Empty Trash.”
In summary, moving files is all about reorganizing and relocating them within your storage, while deleting files involves permanently removing them from your system. Understanding the difference between these two actions will help you effectively manage your downloads and maintain a well-structured file system on your Mac. Always be mindful of what you’re doing to avoid accidental deletions and to keep your important files safe and accessible.
In Crux
Congratulations on learning the art of managing your downloads on Mac efficiently! By understanding how to delete downloads, you have taken a significant step toward maintaining a clean and organized Mac environment. Let’s recap the benefits of effective download management and how it contributes to a smooth Mac experience.
- Enhanced Performance: By regularly deleting unnecessary downloads, you free up valuable disk space. This not only improves the overall performance of your Mac but also ensures that you have enough room for new files and applications.
- Streamlined File Organization: Deleting downloads helps you avoid clutter and keeps your Mac’s file system well-organized. When you remove files you no longer need, it becomes easier to find and access the files that matter most.
- Data Security: Proper download deletion reduces the risk of accidentally sharing sensitive information with others. By removing files from your system that you no longer require, you minimize the chances of unintended data exposure.
Now that you’ve learned the ins and outs of deleting downloads on your Mac, it’s time to put your knowledge into practice and take charge of your file management. Remember these essential tips:
- Regular Maintenance: Make it a habit to review your Downloads folder periodically and delete files you no longer need. This simple practice will help prevent the unnecessary accumulation of files and maintain a clutter-free, Mac.
- Back-Up Important Data: Before deleting files, always ensure you have a backup of essential data. You can use external hard drives, cloud storage services, or Time Machine to keep your valuable files safe.
- Trash Management: Be cautious when emptying the Trash to avoid accidental permanent deletion of files. Double-check the contents of the Trash before emptying it.
- Organize Downloads: Consider creating specific folders for different types of downloads, such as documents, images, and videos. This will make it easier to find and manage files in the future.
By embracing the art of deleting downloads, you have taken control of your Mac’s file system, leading to improved performance and a more efficient workflow. Keep your Mac environment pristine by regularly decluttering and organizing your downloads. By mastering download deletion, you can fully enjoy the benefits of a clean, organized, and productive Mac experience. Happy computing!
How much did you like our detailed Gone in a Click: How to Delete Downloads on Your Mac. Please share these Blogs with your friends on social media.
Related Blogs
- Is iPhone 14 Worth the Hype
- iPhone 15 Pro
- Apple CarPlay
- Apple Watch
- iPhone 6 vs Nexus 6
- Apple Vision Pro
How to Delete Downloads on Your Mac FAQ
Can I delete multiple downloads at once on Mac?
Yes, you can delete multiple downloads simultaneously on Mac. To do this, hold down the "Command" key on your keyboard and click on the files you want to delete. Once selected, drag the files to the Trash, or right-click and choose "Move to Trash." This allows you to efficiently remove multiple files in one go, saving time and effort.
Where are downloads stored on Mac?
By default, downloads on Mac are stored in the "Downloads" folder, which can be found within the user's home directory. You can access the "Downloads" folder from the Dock or by opening the "Finder" window and selecting "Downloads" from the sidebar.
How to free up space by deleting downloads on Mac?
Deleting unnecessary downloads is an effective way to free up space on your Mac. Regularly review the "Downloads" folder and remove files that are no longer needed. After deleting the files, remember to empty the Trash to permanently reclaim the storage space.
Is it safe to delete downloads from the "Downloads" folder?
Yes, it is generally safe to delete downloads from the "Downloads" folder. However, ensure you have checked the files for importance before deletion. Always verify that you no longer need the files to avoid accidental removal of critical data.
Can I recover deleted downloads on Mac?
If you have deleted files from the "Downloads" folder and emptied the Trash, recovering them can be challenging. However, if you have enabled Time Machine backups or used a data recovery tool, you might be able to retrieve the deleted files from a previous backup.
How to delete incomplete or failed downloads on Mac?
To delete incomplete or failed downloads, locate the specific files in the "Downloads" folder, and move them to the Trash. This action will remove the incomplete files from your Mac, freeing up space for other items.
How to delete specific types of downloaded files on Mac?
To delete specific types of downloaded files on Mac, use the Finder's search feature. Type in the file extension (e.g., .docx, .jpg, .pdf) in the search bar, and the Finder will display all files with that extension. Select the files you want to delete and move them to the Trash.
Can I delete downloads from a specific date range on Mac?
Yes, you can delete downloads from a specific date range on Mac. Use the search bar in the "Downloads" folder to search for files created or downloaded within a particular date range. Once the files appear, select and delete them as needed.
How to automatically delete downloads after a certain period on Mac?
Mac does not have a built-in feature to automatically delete downloads after a specific period. However, you can create a custom script or use third-party automation tools to achieve this task. Be cautious when using automation, as it may permanently delete files without any chance of recovery. Always create a backup of important files before attempting any automated deletion methods.


