


")
In our fast-paced digital world, it’s common for users to seek a fresh start and regain control of their online presence. Deleting a Google Voice account can be a significant step towards decluttering and streamlining communication.
Whether you’re looking to consolidate your digital footprint or simply no longer find Google Voice necessary, the decision to delete your account comes with several advantages.
By deleting your Google Voice account, you can bid farewell to an old number, freeing yourself from outdated connections and ensuring a clean slate for future communications. Additionally, it offers an opportunity to enhance privacy and security, as your Google Voice data will be removed from the platform.
Highlight the objective of the blog: to provide users with step-by-step instructions on how to delete their Google Voice account securely.
This comprehensive guide aims to walk you through the process of deleting your Google Voice account confidently. We’ll cover each step in detail, ensuring that you can navigate the deletion process smoothly without any confusion. From backing up your data to completing the final deletion, we’ve got you covered.
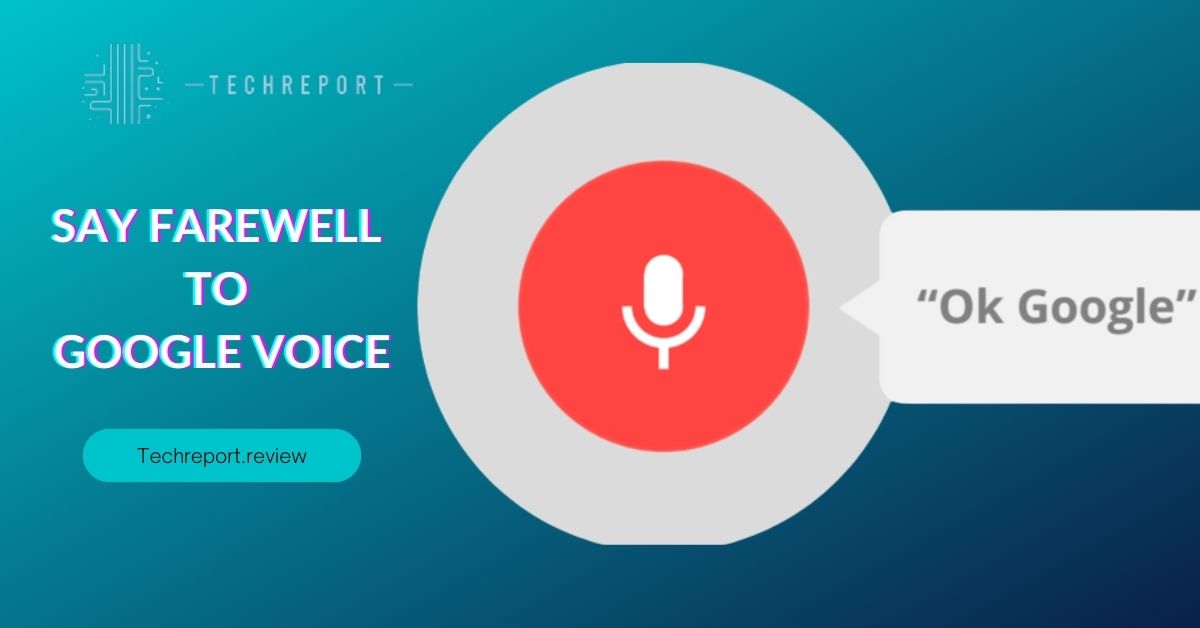
Introduce Google Voice and its functionalities to set the stage for the deletion process.
Google Voice is a communication platform provided by Google that enables users to make calls, send text messages, and manage voicemail using a unique Google Voice phone number. The service offers features like call forwarding, voicemail transcription, and the ability to use the same number across multiple devices.
While Google Voice has proven to be a valuable tool for many, circumstances change, and it’s natural to consider parting ways with the service. Whether you’re transitioning to a different communication platform or simply looking to declutter your digital presence, deleting your Google Voice account is a step worth exploring. With this guide, we’ll help you navigate the process smoothly and confidently.
Deleting Your Google Voice Account
To begin the process of deleting your Google Voice account, follow these steps:
- Sign in to Google Voice: Go to the Google Voice website (voice.google.com) and sign in using the Google account associated with your Google Voice number.
- Access Settings: Once you’re signed in, click on the gear icon (settings) located in the upper right corner of the Google Voice interface.
- Open Account Settings: In the drop-down menu, select “Settings” to access your Google Voice account settings.
- Navigate to “Account” Tab: Within the settings page, click on the “Account” tab to find the options related to your account.
- Scroll Down to “Your Google Voice Number”: On the “Account” tab, locate the section labeled “Your Google Voice Number.” Here, you’ll see your active Google Voice number.
- Click “Delete”: To proceed with deleting your Google Voice number, click on the “Delete” button next to your Google Voice number.
- Confirm Deletion: A pop-up message will appear, asking you to confirm the deletion. Carefully read the information provided and click “Proceed” to confirm the action.
- Verify Your Google Account Password: To ensure account security, you’ll be prompted to enter your Google account password.
- Click “Delete” Again: Once you’ve entered your password, click on the “Delete” button again to confirm the deletion of your Google Voice number.
When you delete your Google Voice account, Google takes measures to ensure your data is appropriately handled:
- Data Retention Period: Google may retain some of your account information, like call history and voicemails, for a limited period after deletion. However, this data is dissociated from personal identifiers and used solely for statistical purposes.
- Personal Information Removal: Your personal information associated with the Google Voice account is dissociated and anonymized within the retention period.
- Irreversible Process: The deletion of your Google Voice account is irreversible, meaning that once you confirm the deletion, your Google Voice number and associated data will be permanently removed.
- Google’s Data Policy: Google follows its data retention and deletion policies to safeguard user information and ensure compliance with data protection regulations.
By following the outlined steps, you can confidently delete your Google Voice account and understand how your data is handled during and after the process. Take a moment to consider if deleting your Google Voice account aligns with your communication needs and privacy preferences before initiating the deletion process.
Temporary Deactivation: An Alternative to Deleting
If you’re uncertain about permanently deleting your Google Voice account but still want to take a break from its services, you have the option to temporarily deactivate your account. Temporarily deactivating your Google Voice account can be an excellent alternative, especially if you plan to return to using the service in the future without losing your data or settings.
To temporarily deactivate your Google Voice account, follow these steps:
- Sign in to Google Voice: Go to the Google Voice website (voice.google.com) and log in using the Google account associated with your Google Voice number.
- Access Settings: Once you’re signed in, click on the gear icon (settings) located in the upper right corner of the Google Voice interface.
- Open Account Settings: In the drop-down menu, select “Settings” to access your Google Voice account settings.
- Navigate to “Account” Tab: Within the settings page, click on the “Account” tab to find the options related to your account.
- Temporarily Disable Google Voice: Look for the option to “Disable Google Voice” or “Deactivate Google Voice.” Click on this option to begin the temporary deactivation process.
- Confirm the Deactivation: A confirmation prompt will appear, explaining that your Google Voice account will be temporarily deactivated and your number will be released. Click on “Proceed” or “Confirm” to finalize the deactivation.
If you wish to reactivate your temporarily deactivated Google Voice account, you can do so by following these steps:
- Sign in to Google Voice: Visit the Google Voice website (voice.google.com) and log in using the same Google account that was associated with your Google Voice number.
- Reactivate Google Voice: Upon signing in, Google Voice will prompt you with the option to reactivate your account. Click on “Reactivate” or a similar button to proceed.
- Confirm Reactivation: A confirmation message will appear, informing you that your Google Voice account will be reactivated, and your number will be assigned back to your account. Click on “Confirm” or a similar option to complete the reactivation process.
- Verify Your Number: Depending on the specific reactivation process, you may need to verify your phone number to ensure security and confirm that you’re the account owner.
By temporarily deactivating your Google Voice account, you can take a break from the service without permanently losing your number or data. Remember that the reactivation process is typically straightforward, but ensure you read any prompts or instructions carefully to successfully reactivate your Google Voice account when needed.
Cancelling Google Voice Subscription
If you’ve been using a paid subscription for additional features in Google Voice but have decided to discontinue it, you can easily cancel your subscription through the Google Voice settings. Here’s a step-by-step guide to help you cancel your Google Voice subscription:
- Sign in to Google Voice: Access the Google Voice website (voice.google.com) and sign in using your Google account credentials associated with your Google Voice number.
- Access Settings: Once you’re logged in, click on the gear icon (settings) located in the upper right corner of the Google Voice interface.
- Open Subscription Settings: From the drop-down menu, choose “Settings” to access your Google Voice account settings.
- Navigate to “Billing” Tab: Within the settings page, click on the “Billing” or “Subscription” tab to find the options related to your subscription.
- Manage Subscription: Look for the option to “Manage Subscription” or “Cancel Subscription.” Click on this option to initiate the cancellation process.
- Confirm the Cancellation: A confirmation prompt will appear, informing you about the consequences of canceling your subscription and losing access to paid features. Review the details carefully and click on “Cancel Subscription” or a similar button to proceed.
Google Voice subscriptions are typically billed on a monthly or yearly basis, depending on the subscription plan you have chosen. When you cancel a subscription, Google may or may not provide refunds based on their policies and the remaining period of your subscription.
It’s important to keep the following points in mind regarding subscription refunds and consequences:
- Prorated Refunds: In some cases, if you cancel your Google Voice subscription before the end of your billing cycle, Google may issue a prorated refund for the unused portion of the subscription. However, this refund policy varies, and it’s advisable to review Google’s refund policy or contact their support for specific details.
- Feature Access: Once you cancel your subscription, you will lose access to the paid features associated with the subscription plan. Your Google Voice account will revert to the standard free version with its basic functionalities.
- Data Retention: Canceling your subscription does not result in the deletion of your Google Voice account or any data associated with it. Your account and data will still be accessible, but you won’t have access to the features exclusive to the subscription plan.
- Future Re-Subscription: If you decide to re-subscribe to a paid plan in the future, you can do so from the Google Voice settings. However, depending on Google’s policies, you may not be eligible for certain promotional offers or discounts if they were previously applied to your canceled subscription.
Before canceling your Google Voice subscription, review your account settings, understand the consequences, and make sure it aligns with your preferences and needs. Keep in mind that Google’s refund and cancellation policies may change over time, so stay informed about any updates to make the most informed decisions regarding your subscription.
Reactivating Deleted Google Voice Account
If you have previously deleted your Google Voice account but have now reconsidered and wish to get it back, there is a possibility to reactivate your account. However, it’s important to note that Google provides a limited window of time within which you can attempt to recover a deleted Google Voice account. Here’s a step-by-step guide to help you reactivate your deleted Google Voice account:
- Visit Google Voice: Go to the Google Voice website (voice.google.com) and sign in using the same Google account credentials you used before for your deleted Google Voice account.
- Check Reactivation Eligibility: If your Google Voice account was deleted recently and is still eligible for recovery, you should see a prompt or notification indicating the possibility to reactivate your account. Click on the provided link or follow the instructions to proceed.
- Account Recovery Page: You will be directed to the Google Voice account recovery page. Here, you might be required to verify your identity by entering your phone number or receiving a verification code via email or text message.
- Confirm Reactivation: Once your identity is confirmed, you will be asked to confirm that you want to reactivate your deleted Google Voice account. Read through any provided information and click on the “Reactivate” or a similar button to proceed.
- Reactivation Process: Google will then begin the process of restoring your deleted Google Voice account. This may take a few moments, so be patient during the reactivation process.
- Account Reactivated: Once the process is complete, you will receive a confirmation that your Google Voice account has been successfully reactivated. You should now have access to your previous Google Voice number and settings.
It’s important to remember that Google provides a limited time window for account reactivation, and this window may vary based on your location and other factors. If too much time has passed since you deleted your Google Voice account, it might not be possible to recover it. In such cases, you may need to create a new Google Voice account with a different number.
Before attempting to reactivate your deleted Google Voice account, ensure that you genuinely want to restore it and that it aligns with your current communication needs. Reactivation is a one-time opportunity, so make sure to consider all factors before proceeding. If you encounter any issues or have questions during the reactivation process, you can reach out to Google’s support for assistance.
In Crux
As we conclude this guide, it’s evident that deleting your Google Voice account can be a powerful decision that grants you greater control over your digital communication. By deleting your Google Voice account, you can experience a sense of liberation and the opportunity to start afresh, whether it’s to redefine your online presence or to adopt a new number for your communication needs. The process of deleting your Google Voice account is straightforward, but its impact can be significant in reclaiming your digital space.
Throughout this blog, we’ve explored the step-by-step process of deleting your Google Voice account, understanding temporary deactivation as an alternative, and managing subscriptions associated with Google Voice. Armed with this knowledge, you now have the confidence to make informed decisions regarding your Google Voice account.
Whether you choose to delete your account for good or opt for temporary deactivation, this guide equips you with the tools to navigate the process seamlessly.
Deleting your Google Voice account offers a world of possibilities. It can mark a fresh start, unburdened by old communication history, and open doors to explore new opportunities. You may find a renewed sense of digital privacy and security, and it allows you to carefully curate your online identity. Additionally, reactivating a deleted Google Voice account offers a second chance for those who might have had a change of heart.
Embrace change and the potentials it brings, as the digital landscape evolves, so can your communication choices.
Remember, deleting your Google Voice account is irreversible, so it’s crucial to weigh the pros and cons before proceeding. If you feel confident in your decision, the process is just a few clicks away. Always ensure you back up any data or information you wish to retain before deletion, as it cannot be recovered once the account is gone.
In conclusion, managing your online presence is a key aspect of navigating the digital world. By understanding how to delete or manage your Google Voice account effectively, you’re taking charge of your communication journey and embracing the possibilities that come with it. Whether you choose to embrace a fresh start or retain your account with newfound knowledge, you’re empowered to make the best decision for your digital life.
How much did you like our detailed Breaking Free: Say Farewell to Google Voice in 5 Easy Steps. Please share these Blogs with your friends on social media.
Related Blogs
- Is iPhone 14 Worth the Hype
- iPhone 15 Pro
- Apple CarPlay
- Apple Watch
- iPhone 6 vs Nexus 6
- Apple Vision Pro
FAQs about Farewell to Google Voice
Can I permanently remove my Google Voice number?
Yes, you can permanently remove your Google Voice number by deleting your Google Voice account. When you delete your account, your Google Voice number will be released, and it will no longer be associated with your account. Remember to download any important information or voicemails associated with the number before proceeding with the deletion, as they won't be recoverable once the account is gone.
What happens to my data when I delete my Google Voice account?
When you delete your Google Voice account, all associated data, including call history, messages, voicemails, and settings, will be permanently removed. Therefore, it's crucial to back up any essential information before proceeding with the deletion.
Is it possible to deactivate my Google Voice account temporarily?
Yes, you have the option to temporarily deactivate your Google Voice account instead of permanently deleting it. To do this, go to voice.google.com, click on the three-dot menu, select "Settings," navigate to the "Account" tab, and click on "Disable Google Voice." This temporary deactivation will pause your Google Voice usage until you decide to reactivate it.
How can I cancel my Google Voice subscription?
If you have a subscription associated with your Google Voice account, you can cancel it by going to voice.google.com, clicking on the three-dot menu, selecting "Legacy Google Voice," and navigating to "Billing." From there, click on "Cancel subscription" and follow the prompts to complete the cancellation.
Are there any consequences for deleting my Google Voice account?
Yes, deleting your Google Voice account will permanently remove your Google Voice number and all associated data, including voicemails, call history, and messages. Additionally, any Google Voice forwarding numbers will also be deleted. Once the account is deleted, it cannot be recovered, so ensure you have backed up any essential information before proceeding.
Can I re-activate my Google Voice account after deletion?
No, once you delete your Google Voice account, it cannot be reactivated or recovered. If you decide to use Google Voice again in the future, you will need to create a new account and obtain a new Google Voice number.
What steps do I need to follow to close my Google Voice account?
To close your Google Voice account, visit voice.google.com, click on the three-dot menu, select "Settings," navigate to the "Account" tab, and click on "Delete your Voice number." Follow the prompts to confirm the deletion, and your Google Voice account will be closed permanently.
Is there a waiting period before my Google Voice account is deleted?
No, there is no waiting period for the deletion of your Google Voice account. Once you confirm the deletion, the process is immediate, and all associated data will be permanently removed.
How to remove my Google Voice voicemail messages before deletion?
Before deleting your Google Voice account, you can download any important voicemail messages by going to voice.google.com, clicking on the three-dot menu, selecting "Legacy Google Voice," navigating to "Voicemail," and choosing the messages you want to save. Then, click on the three-dot menu for each voicemail and select "Download" to save them to your device.


